
Customers and contacts
Capture and manage the companies and people you do business with — the foundation for offers, invoices, projects and time tracking in Blond.
How customers and contacts relate
In Blond, every customer has two layers — the customer as the business relationship, and one or more contacts as the recipients of your documents.
| Customer | Contact | |
|---|---|---|
| Represents | The company, organization or private person you have a business relationship with. | An address at the customer — a specific person, a branch, a regional office or a department with its own billing address. |
| Carries | Projects, offers, invoices, time entries, credit balance — the entire business history. | Address, salutation, email, phone number, preferred language. |
| Count | One per business relationship. | As many per customer as you like. |
TIP
Even when you work with a private individual, Blond internally creates a customer and a contact. If you only enter a contact without a company, Blond automatically creates a customer with that person's name — so you don't have to worry about the distinction.
When your point of contact changes or a second branch is added, you create a new contact — the customer and its entire history stay intact.
All customers at a glance
You'll find the customer list in the sidebar under Customers or directly at https://app.blond.swiss/company.
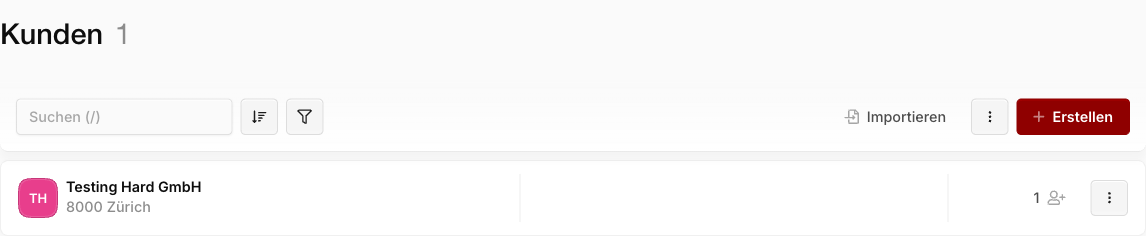
The list is grouped alphabetically by first letter. The search field also matches the name of a contact, an email address, or a value from your custom fields.
Filter: By default only active customers are visible. Use the filter button to show archived customers or narrow the list by category.
Sort: Alphabetical by default. You can also sort by creation date or number of contacts.
Import: If you have customers in Excel or another system, you can import them as CSV or Excel through Import.
Export: The three-dot menu next to Import lets you download the current list as Excel or CSV — respecting the filters currently applied.
Adding a new customer
In the customer list, click + Create in the top right.
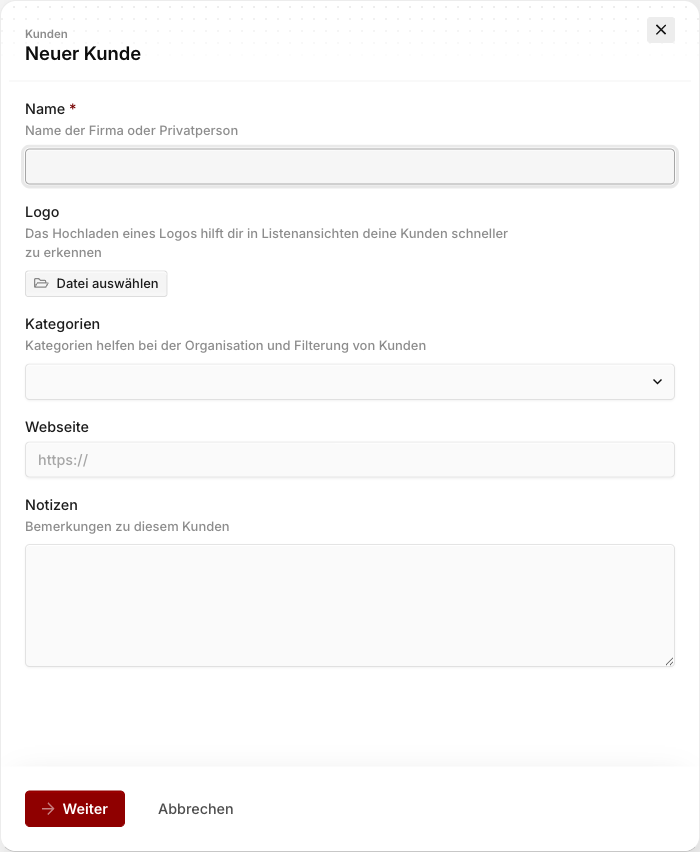
Name: Required. The name of the company or private person as it should appear on documents and in the customer list.
Logo: Optional. Helps you visually identify customers in the list and in the customer portal. It has no effect on your invoices or offers — those use your own company logo.
Categories: Free-form tags to organize your customers (e.g. "Regular customer", "Construction", "Zurich region"). Categories can later be used for filtering and reporting. Type a new category directly into the field to create it.
Website and notes: Optional. Notes are internal only and never appear on documents.
After clicking Continue, Blond creates the customer and immediately takes you to the next step — entering the first contact with salutation, name, address and contact details. Without at least one contact, you can't send the customer an offer or invoice.
Adding contacts to a customer
Open a customer from the list. The header shows the customer's master data, with all contacts listed below.
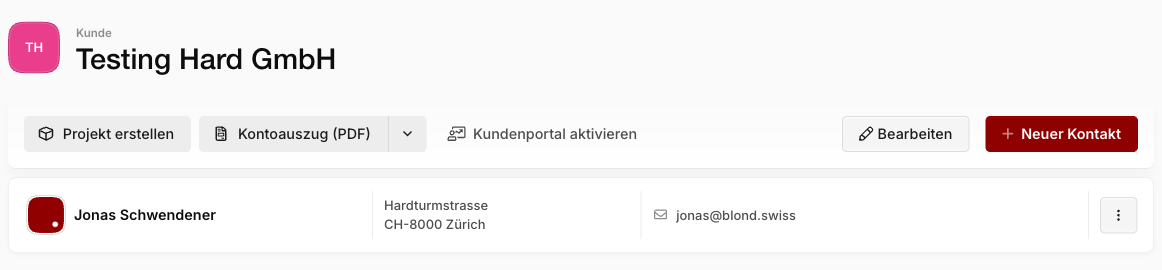
Click + New contact to add another person or address — for example a second branch or a separate billing address for a subsidiary. In that case, just leave salutation and name blank. You then pick the right contact per offer, invoice or reminder.
Note
You can also set a preferred language per contact. Blond then sends automated emails (e.g. payment reminders) in that language and adjusts PDF templates accordingly.
Editing, archiving or deleting a customer
Use the three-dot menu next to each entry in the customer list — or Edit on the detail page — to manage a customer:
Edit: Change master data, logo, categories and notes.
Archive: Hides the customer from the default list without deleting it. The entire history (invoices, projects, credit balance) remains intact and reportable. Use this for customers you no longer actively work with.
Reactivate: Brings an archived customer back into the active list.
Delete: Removes the customer entirely — including all associated contacts. Existing invoices, offers and bookings remain, but lose their link to the customer.
WARNING
Deletion cannot be undone. For a customer with business history, archive is the better choice in almost every case.
Creating a customer's account statement
If a customer wants an overview of their outstanding payments, you can create an account statement with one click: on the customer detail page you'll find the Account statement (PDF) button — the PDF lists all of the customer's open invoices with due date and open amount.

Including paid invoices: By default the account statement only contains open invoices. Via the dropdown next to the button, choose Account statement incl. paid invoices if settled invoices should be listed as well.
TIP
If your customers should be able to check their open invoices themselves at any time, activate the customer portal — the account statement is available there for self-service download too.
Customer portal
Every customer has their own customer portal where they can view and download their open invoices, offers and credit balance. On the customer detail page you'll see an Activate customer portal button — once the portal is enabled organization-wide, you can copy the individual link and share it with the customer.
Learn more in the article Setting up the customer portal.