
Manage your team
Invite new team members to your organization, assign roles and permissions, maintain personnel data and transfer ownership when needed.
You'll find team management under Settings → Members or directly at https://app.blond.swiss/organization/settings/members.
TIP
Every invited person sets up their own user account or uses an existing one. You don't have to set or share any passwords.
Inviting team members
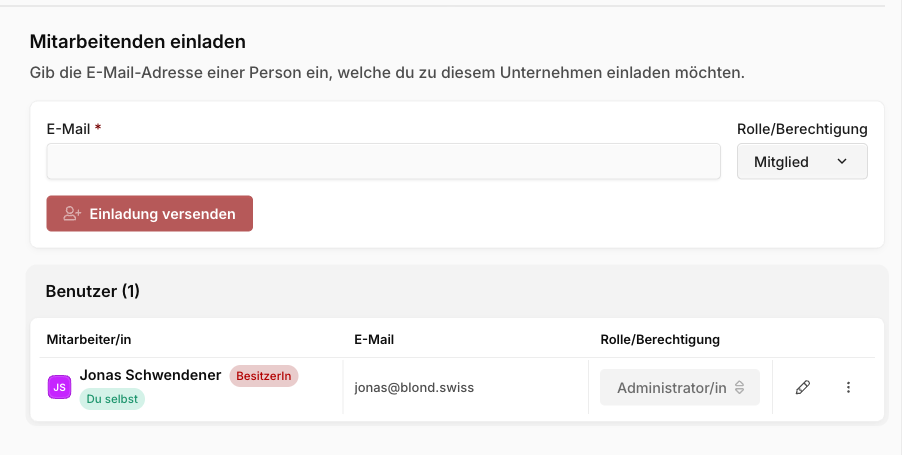
In the Invite a team member section, enter the email address of the person you'd like to add to your organization, pick a role and click Send invitation.
The invited person receives an email with a link to accept the invitation. Only once they accept does their entry appear in the Members list and can they access your organization.
As long as an invitation is still pending, it shows up under Open invitations. From there you can:
- click Send again to resend it — useful if the first email ended up in spam.
- click Delete to withdraw it if you change your mind.
Note
The number of team members depends on your plan. If you've reached the limit, Blond will ask whether you want to switch to a larger plan when you try to invite someone.
Re-invite archived members
If a person previously left your organization or was removed, they appear under Archived members at the bottom of the page. The button next to their entry sends them a fresh invitation — their personnel data and history are preserved.
Roles and permissions
The role determines what a person can see and do in your organization. You pick it when you invite them and can change it later at any time.
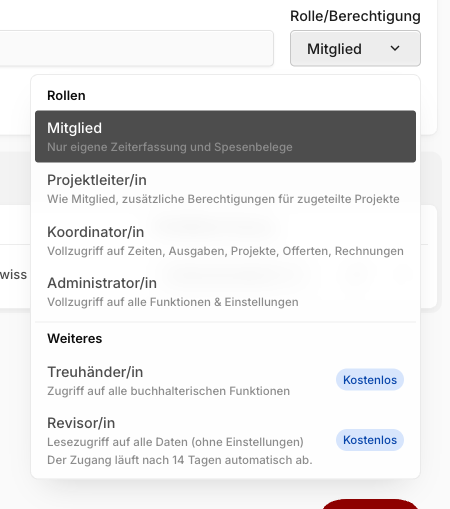
Member: Own time tracking and expense receipts only. The right choice for people who should track their hours and expenses but shouldn't see any other business figures.
Project manager: Like Member, plus extra permissions for assigned projects. A good fit for people running individual projects who don't need full access to accounting or master data.
Coordinator: Full access to time, expenses, projects, quotes and invoices. This role suits people who run day-to-day operations but shouldn't touch settings or accounting.
Administrator: Full access to all features and settings — including billing, integrations and user management. Only give this role to people you fully trust.
Accountant (free): Access to all bookkeeping features — receipts, invoices, banking, VAT, ledger. Designed for your external accountant who helps with your books. This role doesn't count toward your user limit.
Auditor (free): Read-only access to all data, but no settings and no changes. Designed for your annual audit. Access expires automatically after 14 days — so you don't have to remember to revoke it later.
Changing a role
In the Members list, click the role button on the row (e.g. Member) and pick the new role in the dialog.
Warning
You can only change another administrator's role if you yourself are the owner of the organization. You also can't change your own role — ask another administrator or the owner.
Editing personnel data
For each team member you can store additional personnel data: job title, department, supervisor, work schedule, hourly rates and vacation budget. Blond uses this data for time tracking, project billing and absence management.
In the members list, click the pencil icon next to the person to open their personnel data.
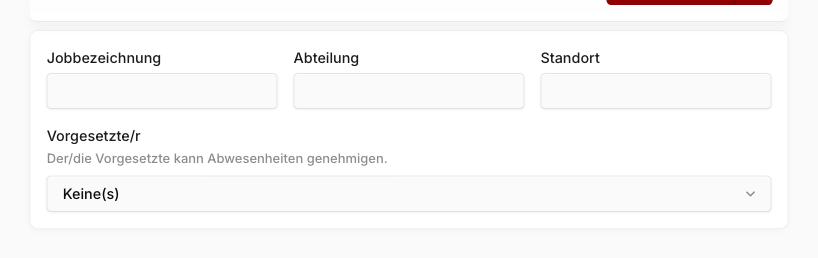
Job title, department, location: Pure information fields for your own overview.
Supervisor: If you pick a person here, they can approve absences for this team member.
Work schedule: Enter the target hours per weekday. These form the basis for overtime and vacation calculations.
Internal hourly rate: Used to calculate internal costs on projects. Changes only apply to new time entries — to apply the new rate retroactively, click Apply retroactively.
Restrict hourly rates: Pick which hourly rates this person may use in time tracking. Leave the selection empty to allow all rates.
Vacation: Store the yearly vacation days and the current remaining balance. Approved absences are deducted automatically.
Removing a team member
In the members list, click the three-dot menu to the right of the person and choose Remove. Confirm in the dialog.
Removed members lose access to your organization immediately. Their tracked time, receipts and documents are preserved — they show up under Archived members, from where you can re-invite them later if needed.
Note
You can only remove an administrator if you yourself are the owner of the organization.
Leaving an organization yourself
If you want to leave an organization, open the same three-dot menu next to your own name and pick Leave.
If you're the owner, you first need to transfer ownership to another person (see the next section).
Transferring ownership
There is exactly one owner per organization. They are the only person who can transfer ownership, delete the organization or revoke the rights of other administrators.
To transfer ownership:
- In the members list, find the person who should become the new owner.
- Click the three-dot menu on the right of their row.
- Choose Pass ownership.
- Confirm in the dialog.
The selected person is automatically promoted to Administrator (if they weren't already) and gets the Owner badge. Your own role stays Administrator — you only lose the exclusive owner rights.
Warning
The transfer takes effect immediately and can only be undone by the new owner. Only transfer ownership to people you fully trust.