
Creating manual journal entries
Record simple entries and compound entries directly in the journal — or import them from a CSV file.
Creating a simple entry
Navigate to Accounting → Journal & Entries and open the posting form via + New entry.
Date: The date on which the entry should be posted.
Entry no.: Preview of the entry number (cannot be changed).
Attach file: Attach a file to your entry, e.g. a receipt or an invoice.
Description: A short description of the entry, e.g. "Rent February".
Debit/Credit: Which accounts are on the debit and credit side. Use the ↔ button to swap debit and credit.
Amount: The amount to be booked.
VAT: Choose the VAT rate that's used automatically for the VAT entry. If no VAT applies, choose "Without VAT".
Warning
The amount booked is always the amount including VAT (gross).
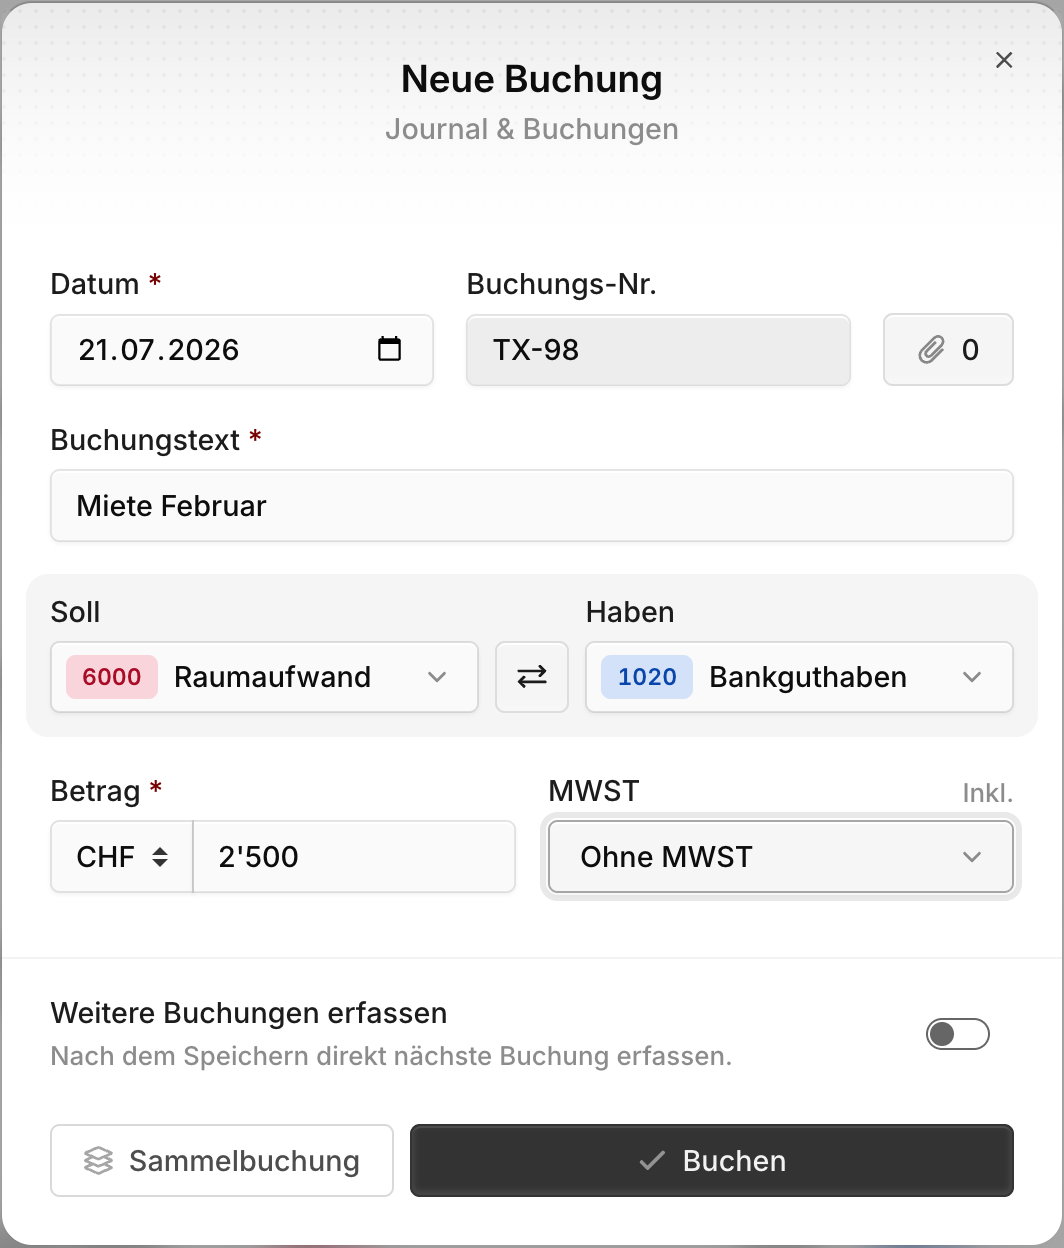
Enable Record more entries if the form should stay open for the next entry after saving.
Creating a compound entry
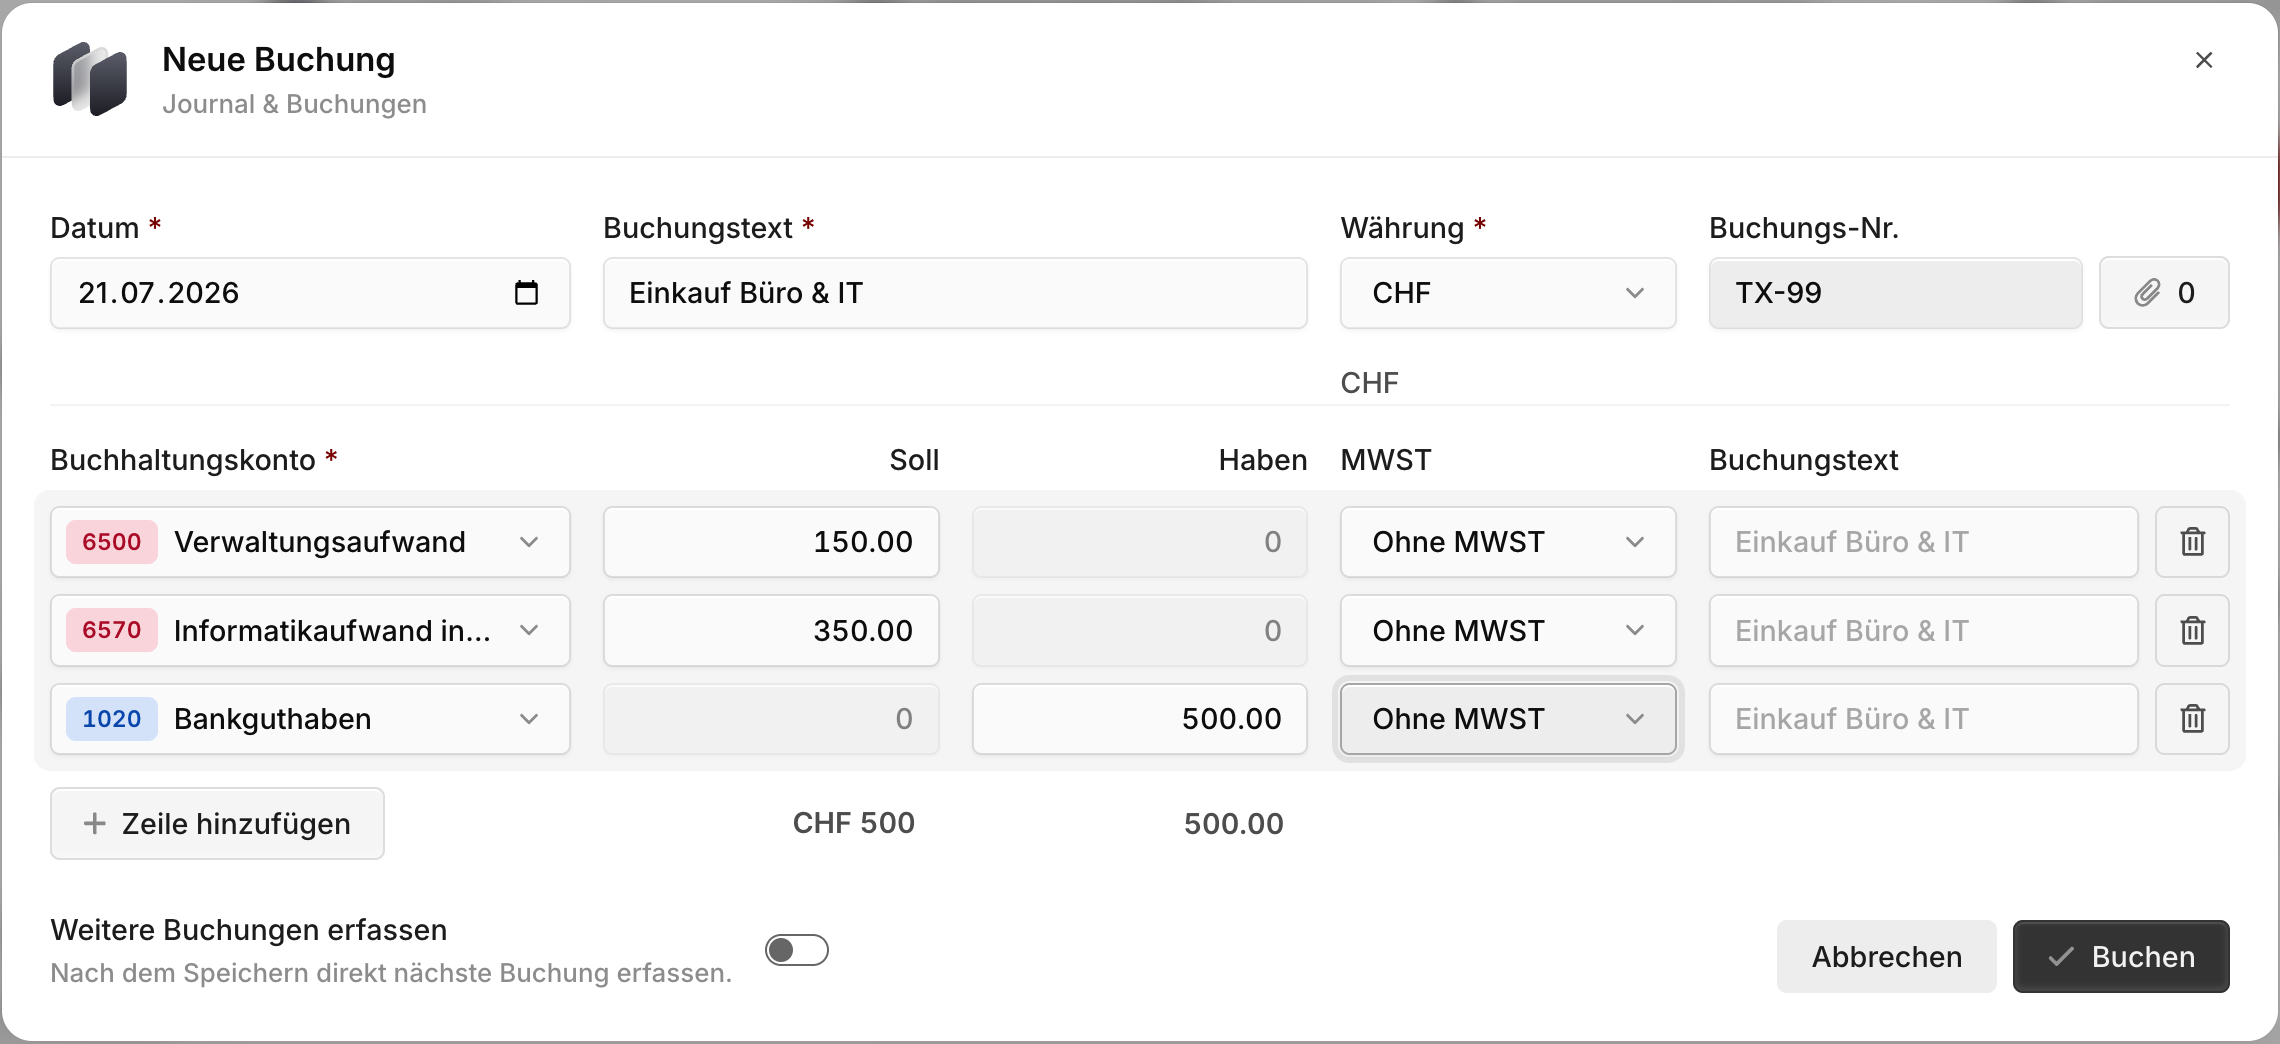
If your entry involves more than two accounts, switch to the extended posting form via the Compound entry button — or open it directly via the dropdown arrow next to + New entry.
Instead of a single debit/credit pair, you record any number of entry lines. Each line contains:
Account: The relevant ledger account.
Debit/Credit: Whether the line's amount is on the debit or credit side.
VAT: If VAT applies, the matching rate — booked gross here as well.
Description: Optionally override the description text per line.
Add more lines with + Add line.
Special VAT entries
Even when it's unclear whether VAT applies on the debit or credit side, it's best to switch to the compound entry form. If you post directly to a VAT system account, Blond does not create automatic tax entries.
Entry templates
You don't need to build recurring entries like salary payments or rent from scratch every time:
Save as template: Save a prepared entry as a template right from the posting form — with a name and a short description.
Apply a template: Open your templates via the template menu next to + New entry in the journal. The posting form is prefilled with the template's accounts and amounts.
Importing entries
You can import manual entries from a CSV file (comma-separated). In the journal, open the dropdown arrow next to + New entry and choose Import CSV.
| Column header | Format | Description |
|---|---|---|
| Date | YYYY-MM-DD | Posting date |
| TxId | Free text | Unique ID used to group lines into one entry |
| Text | Free text | Entry description |
| Document | Free text | Document reference (e.g. invoice number) |
| Account | Number | Account number from the chart of accounts (1000–9999) |
| DebitAmount | Number | Debit amount in CHF |
| CreditAmount | Number | Credit amount in CHF |
| Currency | ISO 4217 | 3-letter currency code (currently CHF only) |
| TaxCode | Number | VAT code per the Swiss FTA (e.g. 303) |
| TaxRate | Number | VAT rate in percent (e.g. 8.10) |
Warning
TxId must uniquely identify an entry. On subsequent imports, existing entries with the same ID are updated, not duplicated.
See Correcting entries for how to change a saved entry later.